9.2 Spring Boot集成ActiveMQ
ActiveMQ是一种基于JMS 1.1规范的开源的消息中间件,ActiveMQ的设计目标是提供标准的,面向消息的,能够跨越多语言和多系统的应用集成消息通信中间件。
ActiveMQ非常成熟,功能强大,在早些年业内大量的公司以及项目中都有应用,偶尔会有较低概率丢失消息,现在社区活跃度在降低,国内应用越来越少。官方现在对ActiveMQ 5.x维护越来越少,几个月才发布一个版本。
9.2.1安装配置
到官网下载最新的 apache-activemq-5.15.10-bin.zip编译好的zip压缩包。
将其解压到磁盘,例如C:\Java\apache-activemq-5.15.10这个目录。
打开命令终端,进入ActiveMQ安装目录下的bin目录,执行activemq.bat start启动ActiveMQ服务器。
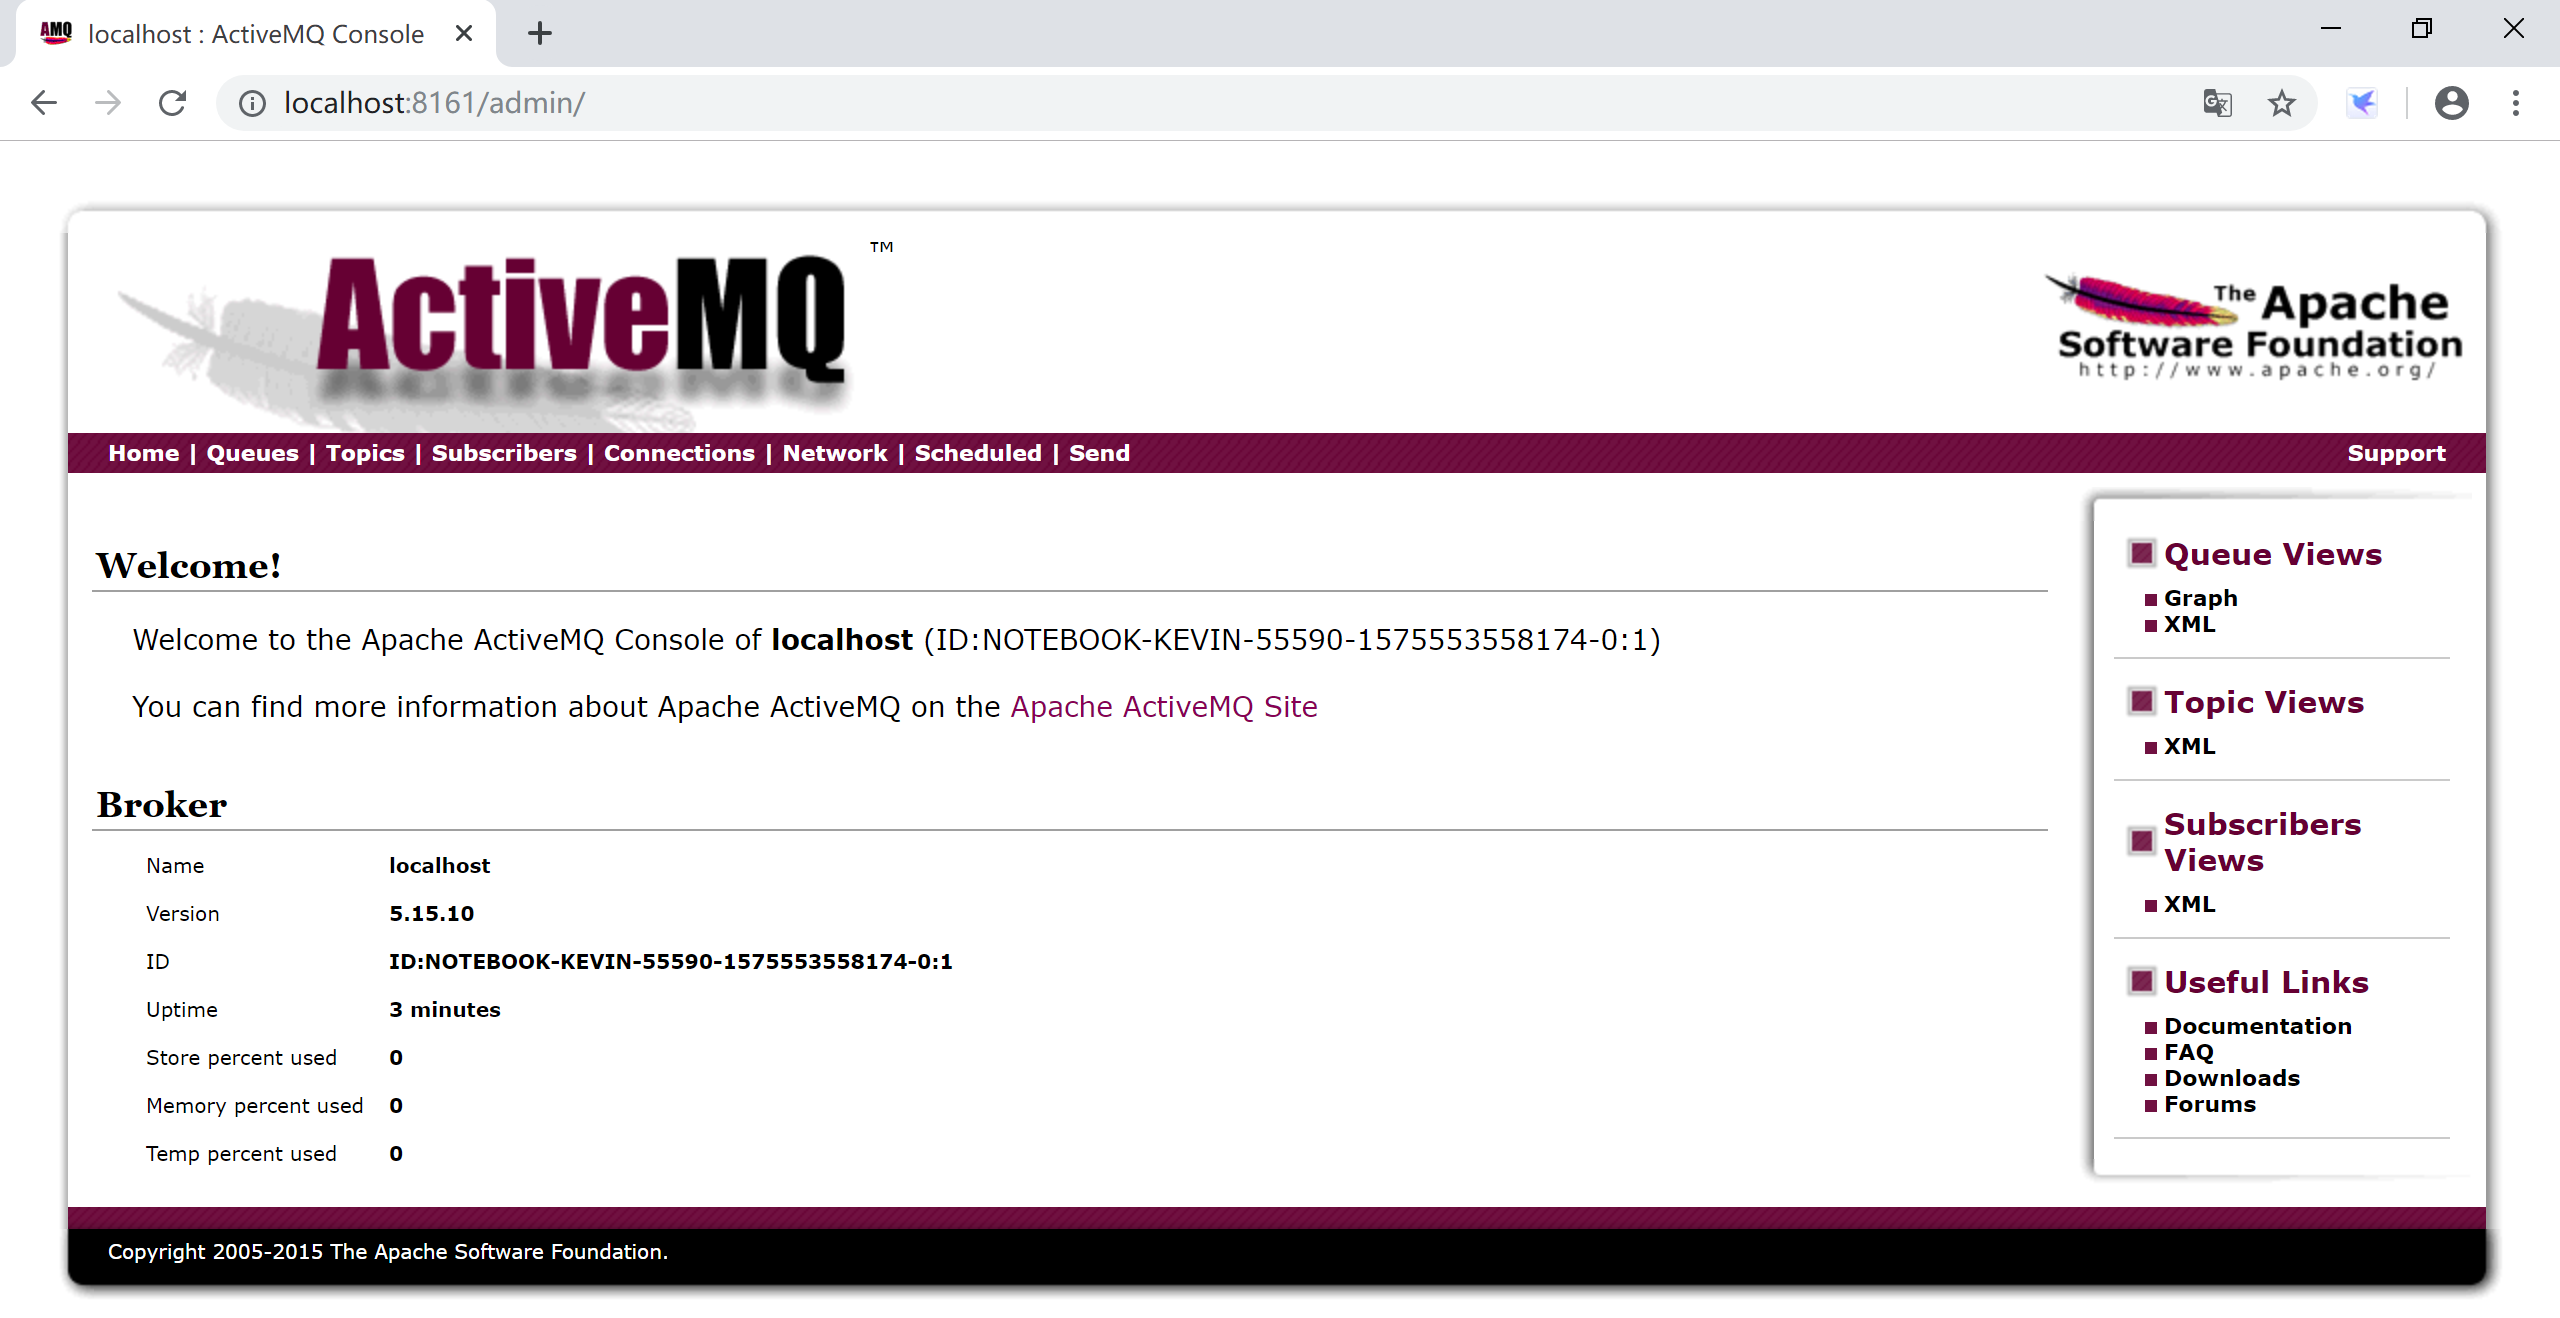
访问http://localhost:8161/index.html控制台,点击Manage ActiveMQ broker用户名和密码都是admin,进入管理界面,检查ActiveMQ是否正确安装。
因为ActiveMQ应用得越来越少,我们就不做集群安装配置演示了。
9.2.2 Spring Boot集成ActiveMQ
Spring Boot为ActiveMQ提供了启动器(starter),集成ActiveMQ很方便。
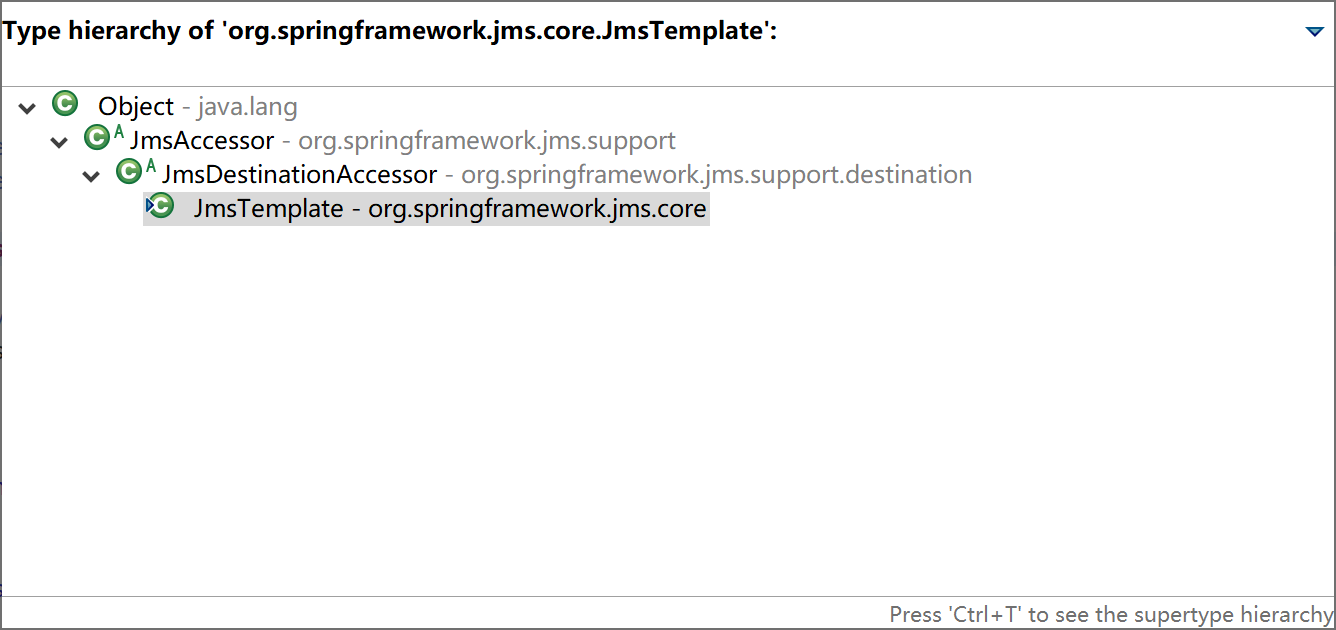
Spring为JMS提供了org.springframework.jms.core.JmsTemplate模板类,封装了常用的消息操作,使用起来非常方便。
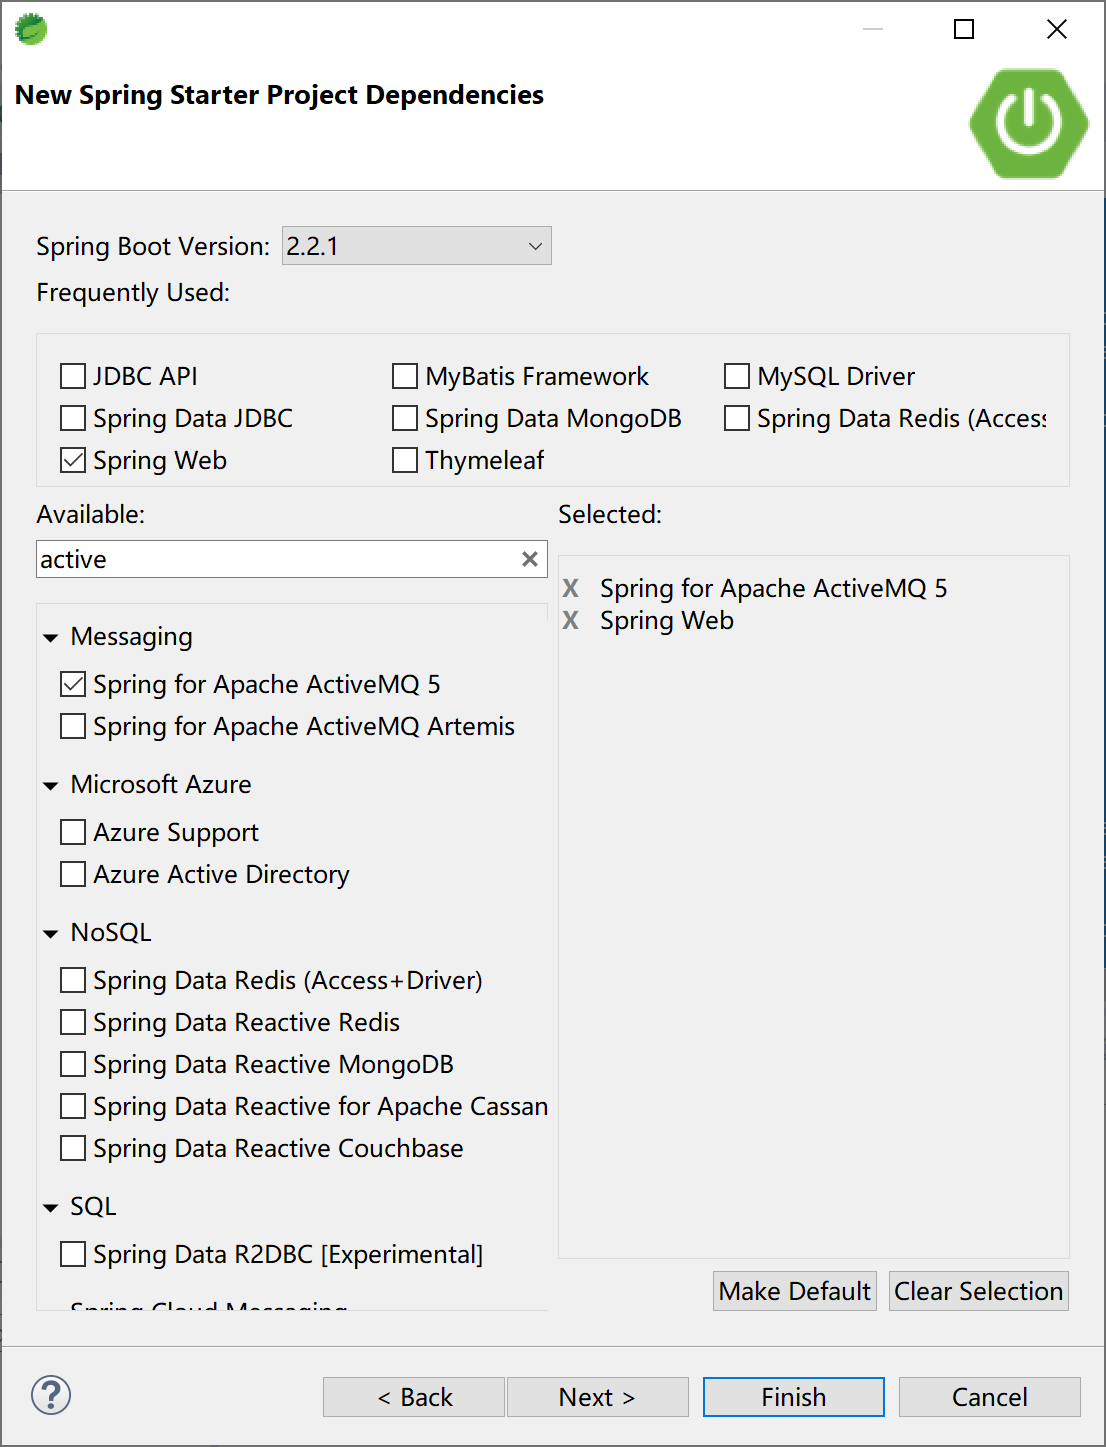
新建一个Spring Boot项目,选择Spring Web和Spring for Apache ActiveMQ 5这两个starter依赖。
项目pom文件,最主要的就是:
<dependency>
    <groupId>org.springframework.boot</groupId>
    <artifactId>spring-boot-starter-activemq</artifactId>
</dependency>
9.2.2.1 点对点(Queue)模式
ActiveMQ的默认配置为点对点模式(spring.jms.pub-sub-domain=false)。
在配置文件application.yml中配置到ActiveMQ的连接信息:
spring:
  activemq:
    broker-url: tcp://localhost:61616
    user: admin
    password: admin
创建一个Controller,接收用户输入,向MQ发送消息:
package com.example.activemq.controller;

import org.springframework.beans.factory.annotation.Autowired;
import org.springframework.jms.core.JmsTemplate;
import org.springframework.web.bind.annotation.RequestMapping;
import org.springframework.web.bind.annotation.RestController;

@RestController
@RequestMapping("/activemq/")
public class ActiveMQController {

    @Autowired
    private JmsTemplate jmsTemplate;

    @RequestMapping("/send")
    public String sendMsg(String msg) {
        jmsTemplate.convertAndSend("Q1", msg);
        return msg + " Sended to Q1.";
    }

}
在Controller中注入private JmsTemplate jmsTemplate;,然后使用JmsTemplate的send方法向Q1队列发送消息。
创建一个服务类,监听消息队列Q1,并简单地将接收到地消息输出到控制台。
package com.example.activemq.service;
import org.springframework.jms.annotation.JmsListener;
import org.springframework.stereotype.Service;
@Service
public class MessageListener {
@JmsListener(destination = "Q1")
public void msgReceive(String msg) {
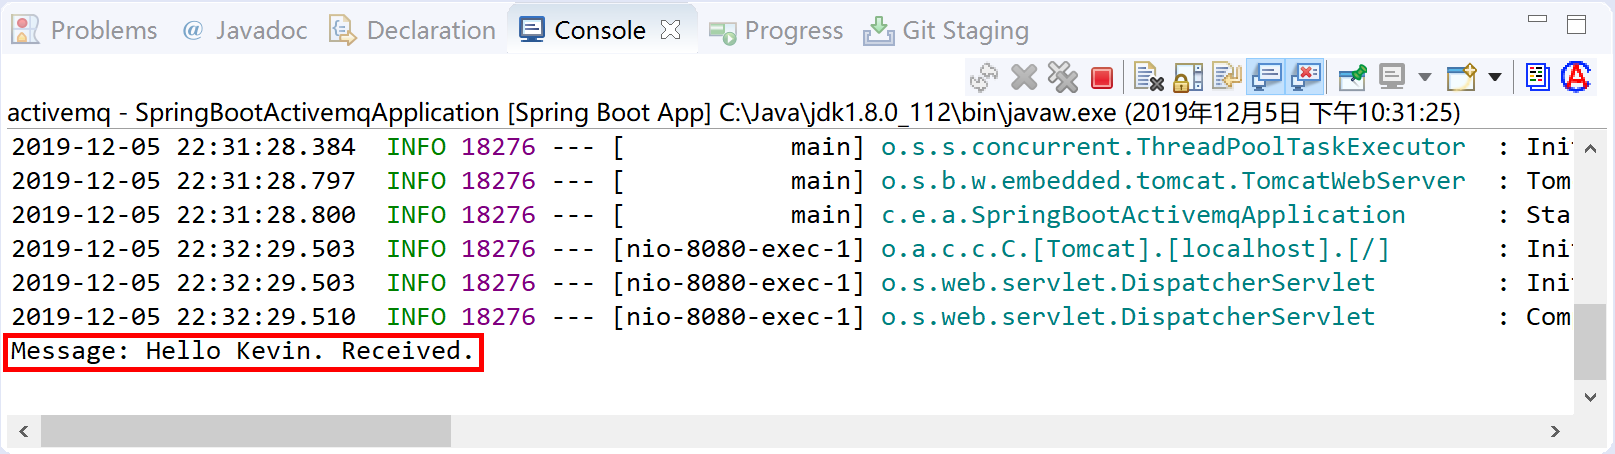
System.out.println("Message: " + msg + " Received.");
}
}
注解@JmsListener(destination = "Q1")表示msgReceive方法监听Q1这个队列。
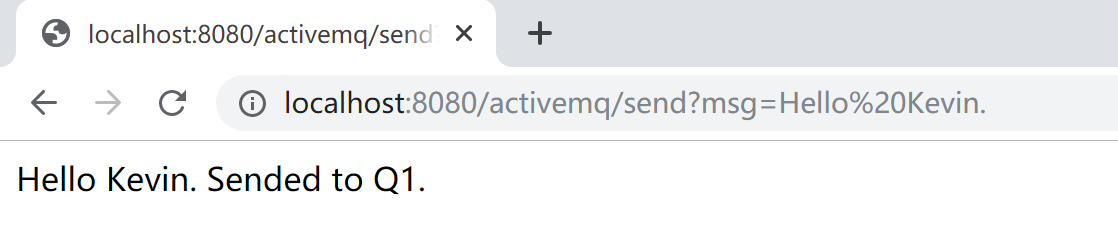
运行Spring Boot应用程序,访问http://localhost:8080/activemq/send?msg=Hello%20Kevin.,向消息队列中发送“Hello Kevin.”这样一条消息。
然后观察Spring Boot应用的控制台,可以看到由MessageListener.msgReceive方法从Q1接收到消息后在控制台输出的信息。
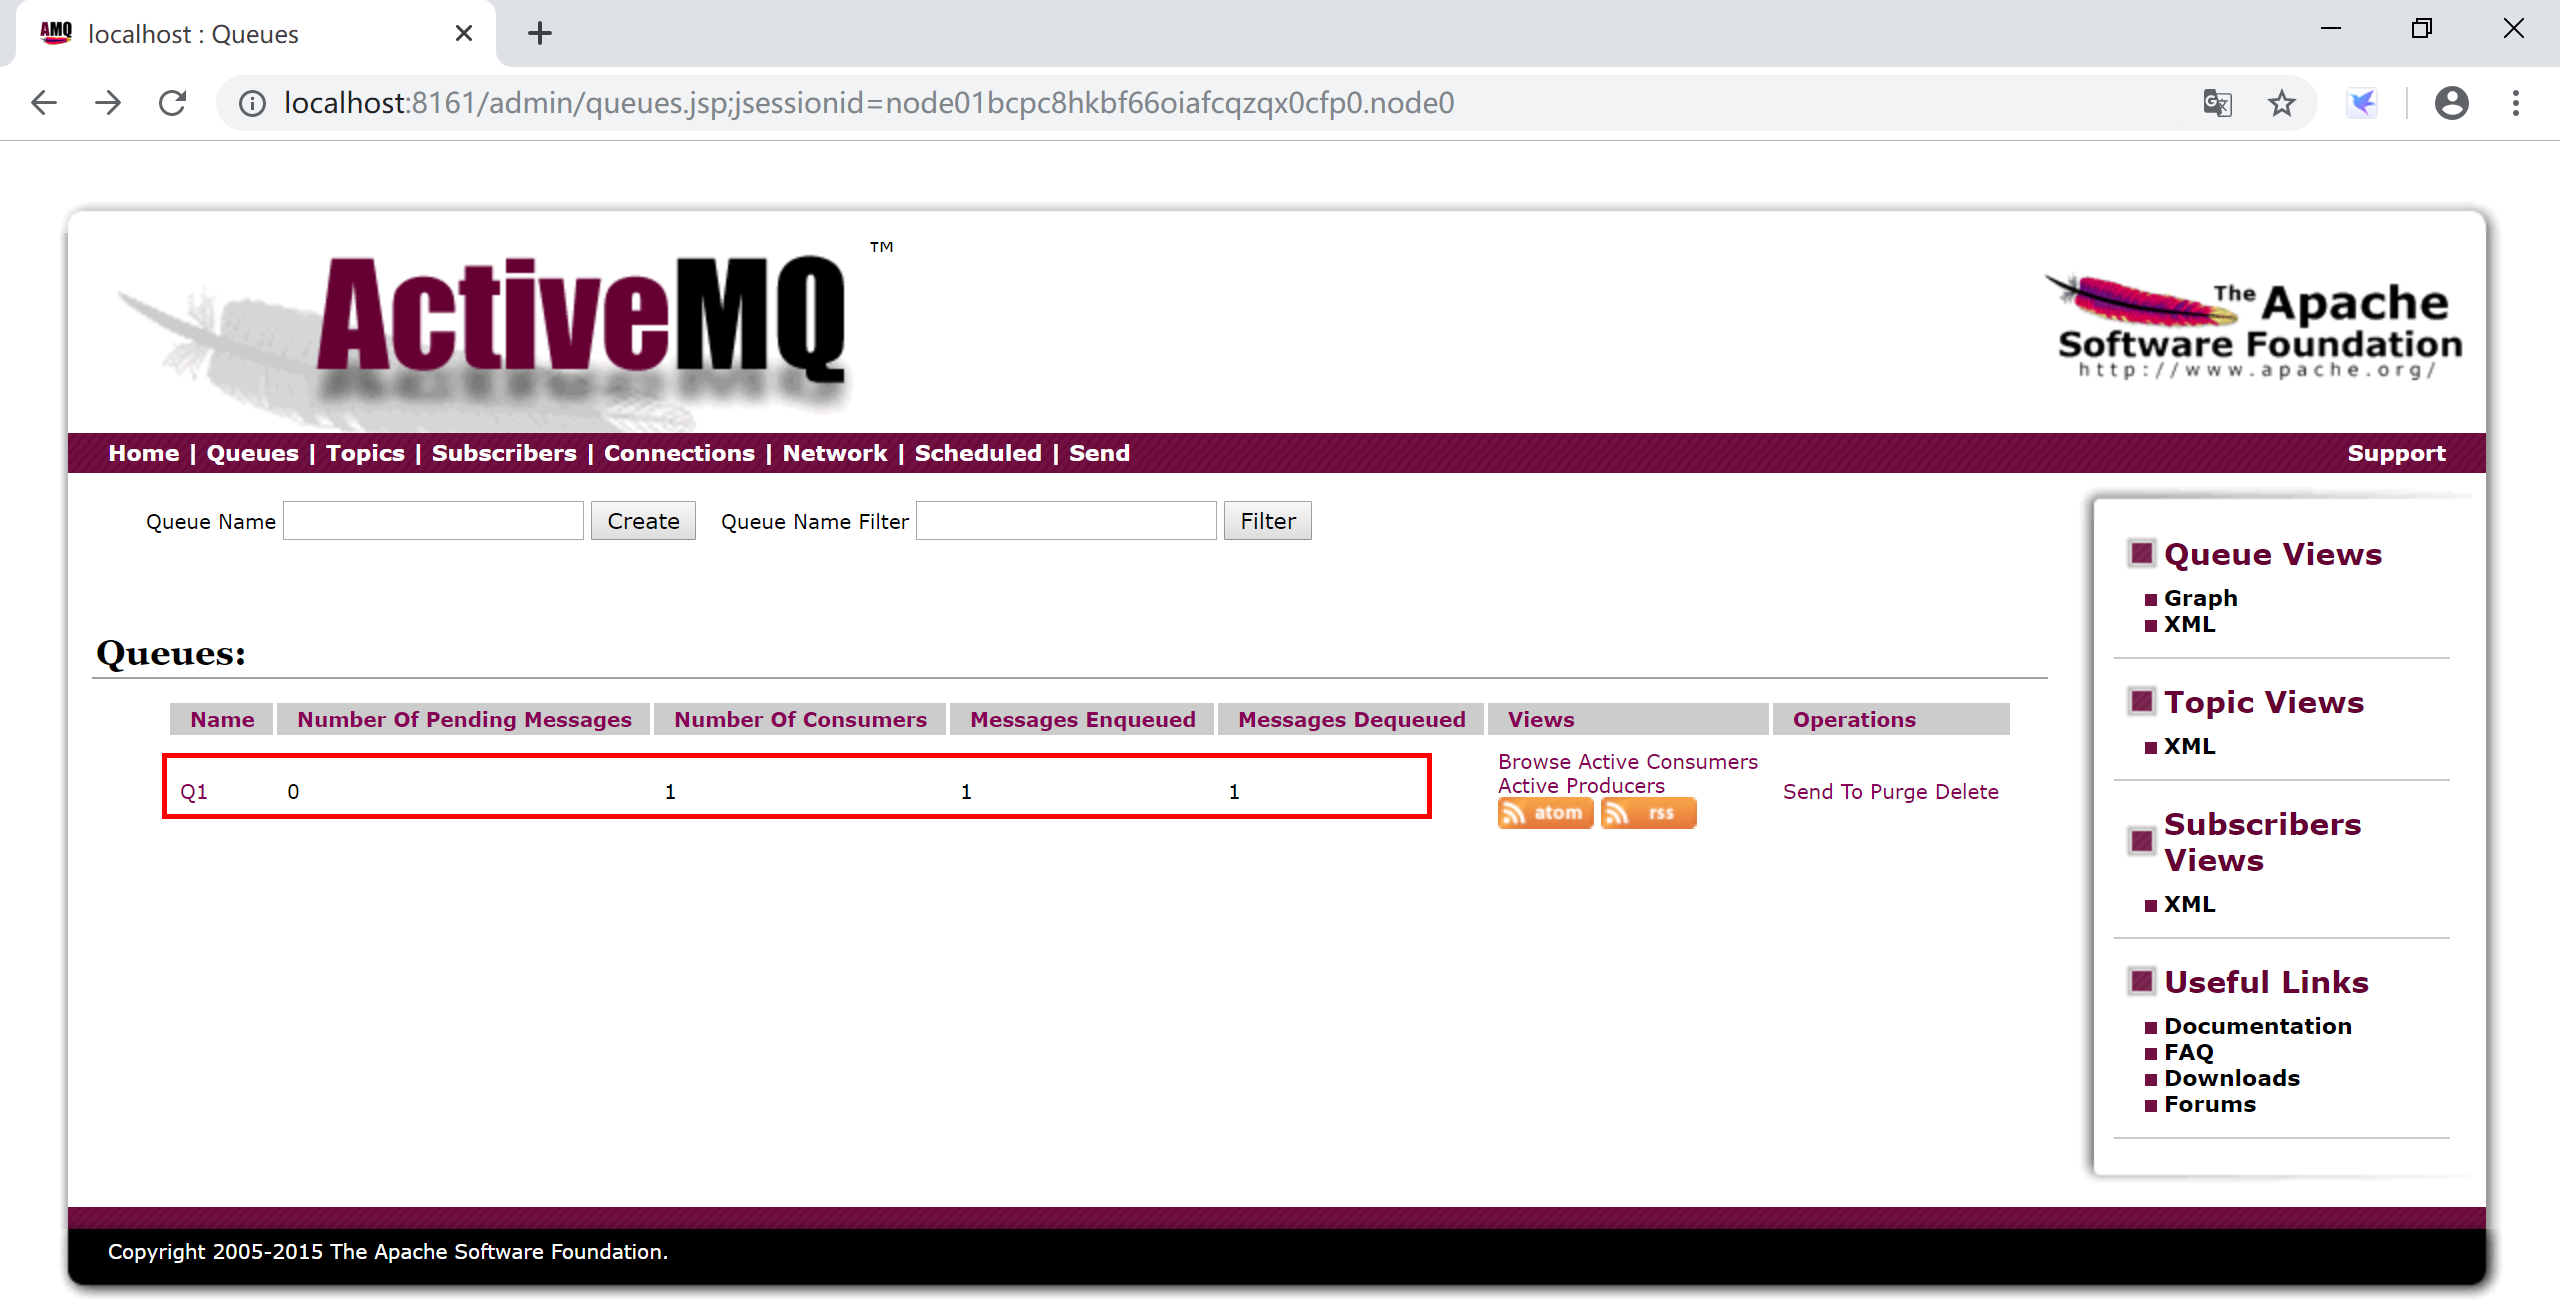
在ActiveMQ的管理控制台,也可以看到由程序创建的Q1队列,及消息消费者和消息相关的信息。
9.2.2.2 发布订阅(Topic)模式
在Spring Boot应用中通过spring.jms.pub-sub-domain=true配置,打开Spring对ActiveMQ发布订阅模式的支持。
新创建一个Spring Boot项目,选择Spring Web和Spring for Apache ActiveMQ 5这两个starter依赖。
在配置文件application.yml中配置到ActiveMQ的连接信息:
spring:
  activemq:
    broker-url: tcp://localhost:61616
    user: admin
    password: admin
    packages:
      trust-all: true
  jms:
    pub-sub-domain: true
在com.example.activemq.topic.producer包下面创建消息生产者类TopicProducer,将消息发送到“Topic-Weather”这个Topic上。
package com.example.activemq.topic.producer;

import org.apache.activemq.command.ActiveMQTopic;
import org.springframework.beans.factory.annotation.Autowired;
import org.springframework.jms.core.JmsTemplate;
import org.springframework.stereotype.Component;

@Component
public class TopicProducer {

    @Autowired
    private JmsTemplate jmsTemplate;

    public void sendMessage(String msg) {
        ActiveMQTopic destination = new ActiveMQTopic("Topic-Weather");
        jmsTemplate.convertAndSend(destination, msg);
    }

}
在com.example.activemq.topic.consumer包下创建消息消费者TopicConsumer,通过两个消息监听方法模拟两个订阅“Topic-Weather”主题的消息消费者(subscriber1和subscriber2)。
package com.example.activemq.topic.consumer;
import org.springframework.jms.annotation.JmsListener;
import org.springframework.stereotype.Component;
@Component
public class TopicConsumer {
/**
* 消息消费者1,监听"Topic-Weather"上的消息
* @param msg 消息
*/
@JmsListener(destination = "Topic-Weather")
public void subscriber1(String msg) {
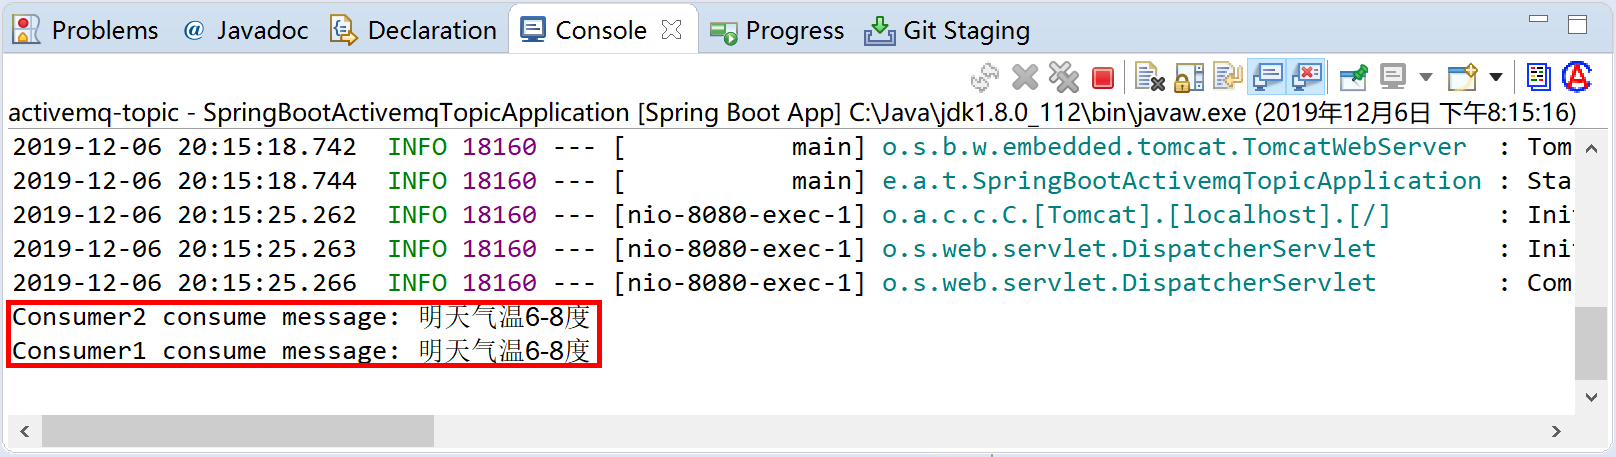
System.out.println("Consumer1 consume message: " + msg);
}
/**
* 消息消费者2,监听"Topic-Weather"上的消息
* @param msg 消息
*/
@JmsListener(destination = "Topic-Weather")
public void subscriber2(String msg) {
System.out.println("Consumer2 consume message: " + msg);
}
}
在com.example.activemq.topic.controller包下创建和用户交互发送消息的控制器,在其中调用消息生产者TopicProducer类来发送消息。
package com.example.activemq.topic.controller;

import org.springframework.beans.factory.annotation.Autowired;
import org.springframework.web.bind.annotation.RequestMapping;
import org.springframework.web.bind.annotation.RestController;

import com.example.activemq.topic.producer.TopicProducer;

@RestController
@RequestMapping("/activemq/")
public class TopicController {
    @Autowired
    private TopicProducer topicProducer;

    @RequestMapping("/send")
    public String sendMsg(String msg) {
        topicProducer.sendMessage(msg);
        return msg + " Sended to Topic-Weather.";
    }

}
运行Spring Boot应用程序,访问http://localhost:8080/activemq/send?msg=明天气温6-8度,向消息队列中发送“Hello Kevin.”这样一条消息。

然后观察Spring Boot应用的控制台,可以看到由TopicConsumer.subscriber1方法和TopicConsumer.subscriber1方法订阅Topic-Weather这个主题后接收到消息,在控制台输出的信息。
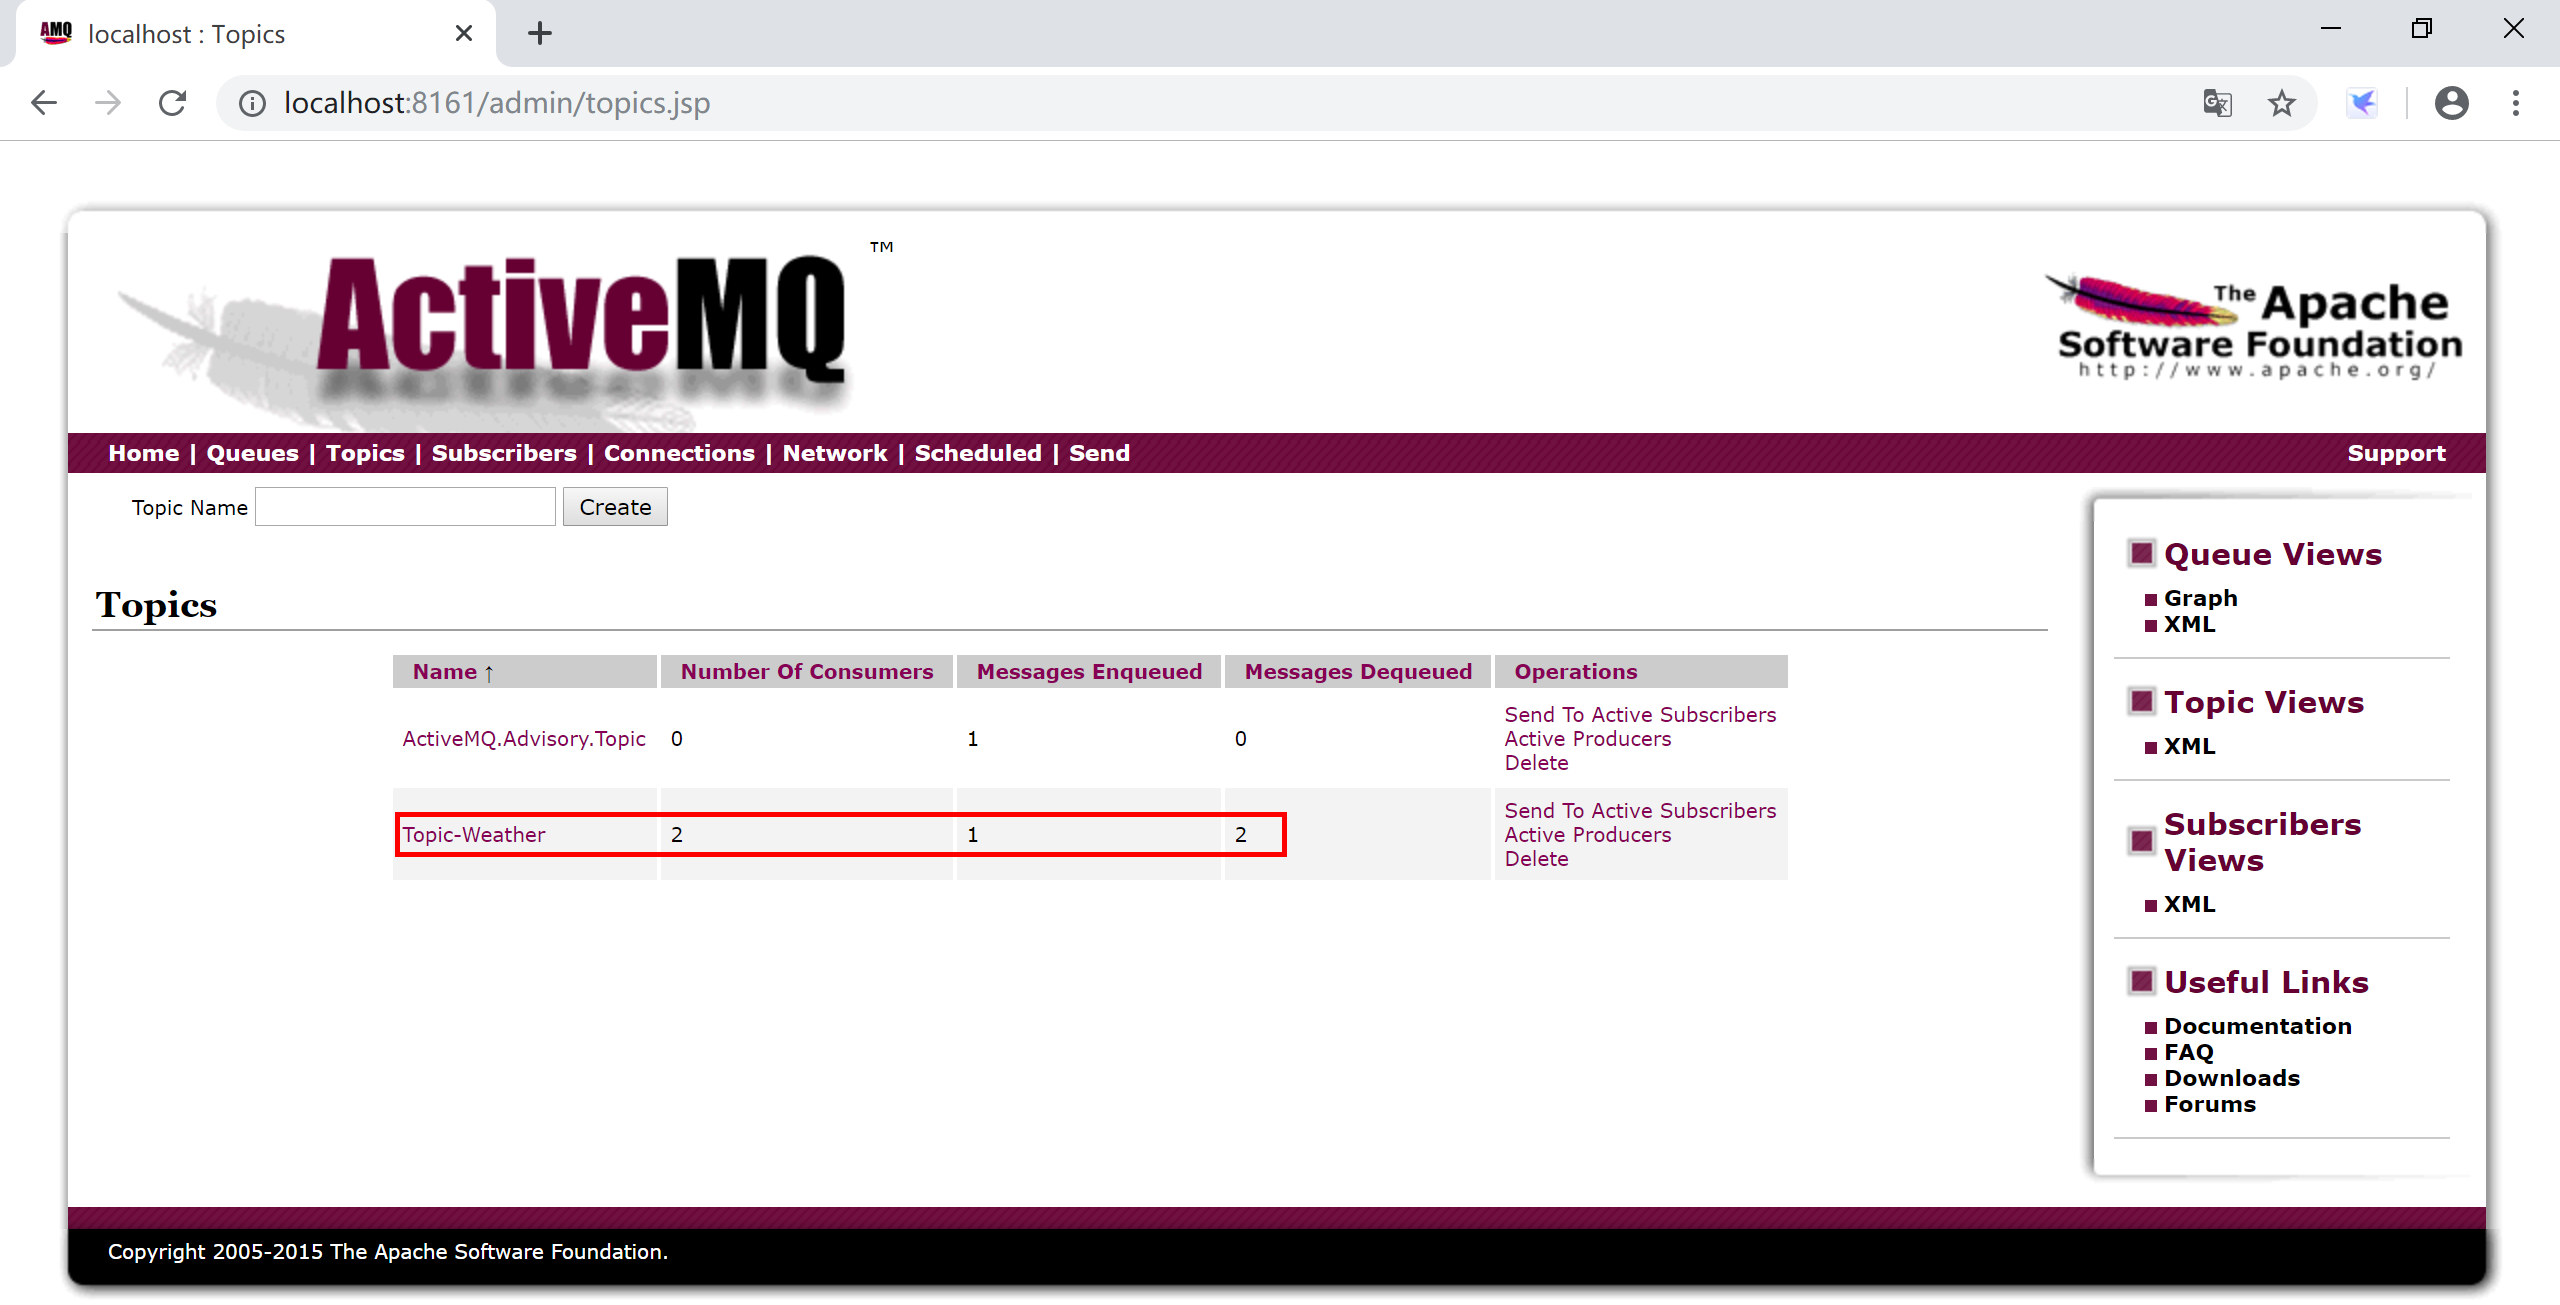
在ActiveMQ的管理控制台,也可以看到Topic-Weather及其消费者数量等信息。
本小节示例项目代码:
https://github.com/gyzhang/SpringBootCourseCode/tree/master/spring-boot-activemq
https://github.com/gyzhang/SpringBootCourseCode/tree/master/spring-boot-activemq-topic